






DIY water drip system for your mini garden: Turn plastic bottles and thread into a simple self-watering setup
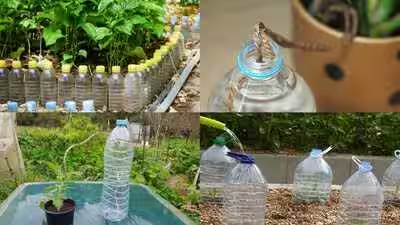
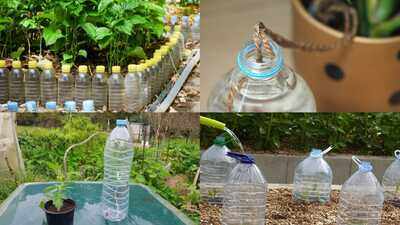
Anyone who’s come back from a weekend away to find their balcony plants wilted knows the problem this solves. A self-watering bottle system, built entirely from things most households already have lying around, has been quietly used by gardeners for years as a low-tech way to keep soil consistently moist without electricity, pumps, or daily attention. Cotton wicks for this exact purpose were traditionally used in India long before it became a popular DIY trend elsewhere, which makes it a fitting project for anyone tending a mini balcony garden here. All it really takes is an empty plastic bottle, a length of cotton thread or string, and about fifteen minutes. Here’s how to put one together, step by step.
Gather your materials
Before starting, it helps to have everything laid out. You’ll need one clean plastic bottle (a 1- or 2-litre size works well depending on how many plants you’re watering); a length of cotton string, twine, or a strip cut from an old cotton shirt, a pair of scissors or a craft knife; potting soil, and something sharp like a drill bit, awl, or heated nail to punch a hole through the bottle cap. The material for the wick matters more than people expect: it needs to be something absorbent, like cotton, rather than synthetic fabric that won’t draw water properly.
Cut the bottle and prepare the cap
Rinse the bottle thoroughly and peel off the label, then cut it roughly in half, the top half, with the neck and cap, will eventually hold the soil and plant, while the bottom half becomes the water reservoir underneath. Keep the cap on for now, since it needs one more modification: punch or drill a hole through the centre of the cap, just wide enough to thread your wick material through snugly. This hole is what allows the wick to travel from the water below into the soil above once everything is assembled.
Thread the cotton wick through
Take your length of cotton string and thread it through the hole you just made in the cap, leaving roughly equal lengths hanging on either side. One end will eventually sit down in the water reservoir, while the other will run up into the soil where your plant’s roots are. If the string doesn’t sit snugly in the hole, a small dab of hot glue around the opening can help hold it in place and stop water from leaking out around the edges once the system is running.
Assemble the two halves
With the cap and wick in place, screw the cap back onto the top half of the bottle, then turn that top half upside down and fit it into the bottom half like a funnel, so the neck and dangling wick hang down into the empty reservoir space below. The two pieces should sit snugly together, with the cut edge of the top half resting inside the rim of the bottom half. At this stage, the wick should be hanging freely into the space that will soon be filled with water.
Add soil and prime the wick
Now fill the inverted top half with potting soil, taking care to hold the wick up as you go so it runs through the middle of the soil rather than getting buried flat at the very bottom. The wick needs to run through the soil so it can carry moisture to the plant’s roots through capillary action, the same basic process by which roots normally draw water upward, and once the soil is in place, water it lightly from the top. This first watering wets the wick and soil enough to kick-start that capillary pull before the reservoir takes over.
Fill the reservoir and let capillary action take over
Pour water into the bottom reservoir until it covers the dangling end of the wick, then plant your seedling or small plant into the soil above. From here, the system runs largely on its own, a bottle system like this may only need refilling every seven to ten days depending on temperature and humidity, making it a genuinely low-effort way to keep soil evenly moist. A quick glance at the reservoir is usually enough to tell when it’s time to top it up again.
Tips to make It work even better
Choosing a darker-coloured bottle also helps, since it blocks light and reduces algae growth inside the reservoir over longer stretches of use. Avoid overfilling the reservoir too high against the soil, since roots need consistent moisture, not standing water.
A small setup, a lot less worrying
Once it’s assembled, this little system quietly does the work of daily watering without needing to be told twice. It’s a genuinely useful trick for anyone juggling a busy week, a short trip, or simply a habit of forgetting the watering can, and it costs next to nothing to put together. A row of these lined up along a balcony ledge can keep an entire mini garden hydrated with barely any effort beyond the initial fifteen minutes it takes to build one.
Disclaimer:
This article is intended for general informational purposes only. Results may vary depending on the plant, pot size, climate, and wick material used. Check the reservoir regularly, especially in the first few weeks, to make sure the wick is drawing water properly, and adjust the number of wicks or refill frequency as needed for your specific plants.